May 20th, 2014
I finally found some spare time to upload the schematic for the Arc Dimmer:


Everything should be straightforward so I’m just going to give you a few notes on the optional components. If you want to build a stand-alone dimmer which is controlled via buttons and/or potentiometers, place components R36-R39, C30-C31 and D30-D31. If you want to build an I2C bus-controlled dimmer, place components U30 and R30-R35 (with the exception of R32/R33). U40 and U41 are there just to provide different footprints on the PCB.
PDF version of the schematic can be found on the Projects page.
May 19th, 2014
My friend asked me if I could make him a push-button controlled LED dimmer, so I did! And went a bit haywire with the options list, as usual. Instead of making a single-purpose dimmer I decided to make it a bit more universal and bulletproof. Here are the basic specs:
- operating voltage: 12-24V DC
- load current: up to 10A (or more with a different output switch)
- protected against overvoltage, overcurrent and overtemperature
- two configurable control inputs
- optional I2C interface for bus control
- status and power LEDs
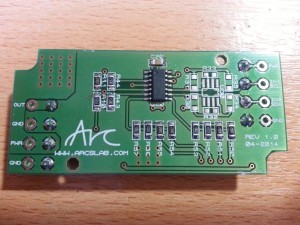
The PCBs arrived a few days ago and I assembled one unit for testing. A few parts are missing because they are on order and should arrive soon. Here are a few pics until I prepare the documentation:


March 27th, 2014
March 27th, 2014
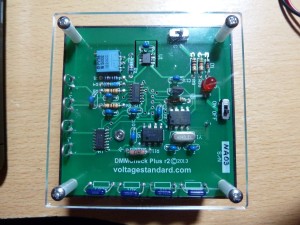
I borrowed a DMMCheck Plus from my colleague today and decided to check the accuracy of my multimeters. First up is the UT71C multimeter from UNI-T. It’s a 40000 count TrueRMS meter with decent specifications. Let’s see if it passed with flying colours or failed miserably!
Here is the actual DMMCheck Plus with its specification sheet if anyone is interested:

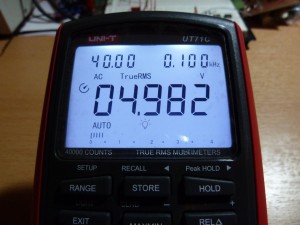
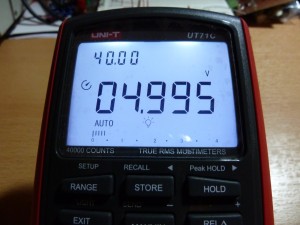
And now let’s take a look at the results. Both the DMMCheck and UT71C were left alone for around 30 minutes to get to know each other and for their references to stabilize (room temperature was 21C/70F). UT71C is around 4 years old, with factory calibration.
AC/DC voltage measurement: passed!
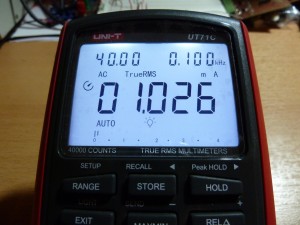
AC/DC current measurement: passed!

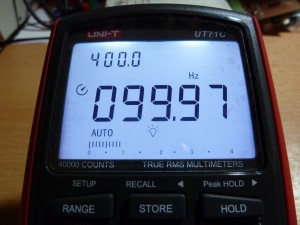
Frequency and duty cycle measurement: passed!

Resistance measurement: passed!


And there you have it, not bad at all considering the price! I do have to mention that the current measurement was fluctuating a bit with the backlight on (it’s probably a good idea to replace the battery).
UPDATE: I stand corrected on the previously “failed” AC current measurement. According to the manual (which I haven’t fully read), AC current accuracy is lower than what’s indicated on the UNI-T’s web site and only valid within 10-100% of the range. I tried to measure 1mA on a 40mA range and that is lower than the 10% of the range to meet the specified accuracy. Big thanks to Wytnucls at EEVBlog Forums for pointing this out!
January 25th, 2014
Delivery of new PCBs was delayed because of the holidays but now I finally have a complete set so I can get to work on actual firmware.
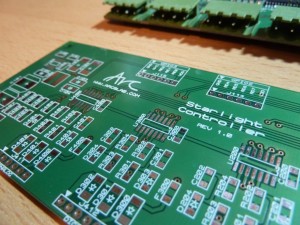
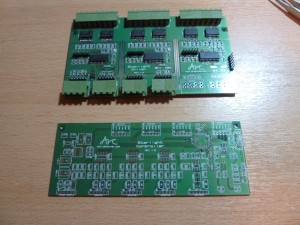
Most of the parts are populated; all hand soldered because I was lazy to take out my hot air station. First attempt at TQFP soldering and all went well. Of course, nothing is complete without a bodge. I first soldered the 3.3V PIC instead of the 5V one so the power pad got lifted during desoldering. D’oh!


January 2nd, 2014
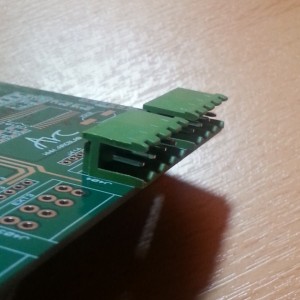
Santa made me very happy the other day when I saw an envelope in my mailbox. Since I ordered two different PCBs I wasn’t sure which one was in the envelope but it turned out it was the Driver PCB for my Starlight Controller project. Excuse the crappyness of my phone’s pictures but my digital camera is on holidays until further notice…


And a short rant time! While designing the PCB I used the terminal connectors’ datasheet as a guide for hole placement. Apprently, I was looking at the wrong datasheet because my connectors hang off the PCB by 1mm. Instead of 10mm hole-to-edge distance my connectors have 11mm distance. Normally this wouldn’t be a problem but since this PCB is supposed to go into a DIN-rail enclosure I could face some problems later…
January 2nd, 2014
A few years ago I made a simple stair lights controller for my parent’s house. Powered by a single PIC16F877 running at 20MHz it had 20 pwm channels and an RS485 interface that I never fully implemented (it simply wasn’t needed). Outputs were driven by BSP170 mosfets that turned out to be highly sensitive to ESD during soldering but pretty reliable when soldered to a PCB. As I was still learning how to program microcontrollers at that time I was fascinated by the things you could accomplish with a microcontroller so instead of having a simple one-by-one animation I decided that a wave-like effect would be better. Everything was placed on a single PCB with through-hole components and I was extremely proud of my work. This simple circuit ran flawlessly for the past 4 years until it met its archenemy – the water! As you already know, water doesn’t mix well with electronics and although nothing blew up (except the fuse in the power supply) there was severe oxidation all over the PCB and…well…now it’s time to make a new version. Bigger and better than before!
And so the Starlight project was born. Basic idea is something like this: provide a decent amount of PWM outputs for LED strips and avoid previous design flaws. And overcomplicate things, bwahahahaha!! Here are my initial specifications:
- 24 PWM channels (because 24 is multiple of 8)
- up to 1A of output current per channel
- up to 4 digital inputs (for proximity sensors)
- up to 2 analog inputs (for…something…a light sensor?)
- CAN interface for future expansion
- USB interface for configuration
- a few status LEDs (because everybody loves blinking lights!)
- optional configuration PCB for stand-alone configuration
I have already received one PCB for the PWM drivers and the controller PCB is on the way. Unfortunately, due to the holidays I didn’t have enough time to actually order parts so now I have to wait until everything arrives (a week or so). It’s very sad to look at the finished PCBs and not have the parts to solder…
December 4th, 2013
This is a follow-up to the protected analog input post showing you how to implement protected digital input with noise filtering and debouncing. It can be used for interfacing remote switches and pushbuttons to your device with overvoltage protection up to 30V.
Everything that was said for the analog input is still valid here. So much that the actual circuits are almost identical with the difference being mainly the final stage. Schmitt-trigger NAND gate was used to shape-up the input signal into a clean square wave output and the RC low-pass filter (R1/C1) is here to filter out noise and debounce switch contacts. Second schmitt-trigger gate was used to invert the inverted signal (invertception?!) thus restoring the logic state present on the input. It can be removed but I had two unused gates and I just had to use them.
So, without further delays, here is the schematic:

Transient and overvoltage protection is identical to the analog input’s circuit. TVS diode for transient and a Zener diode for long-term overvoltage conditions. If you compare the two schematics you will probably notice that the value of pull-down resistor has been increased to 100k. This forms a voltage divider that scales the input voltage down to approximately 90% of its value. Assuming a minimum 5V input signal, this leaves 4.5V at the gate’s input while the positive-going threshold voltage is around 3.5V for the CD4093 IC when powered from a 5V supply. This translates to a typical value of 70% of the supply voltage and we have 90% available. Well above the threshold.
Read the rest of this entry
December 3rd, 2013
During the development of one light controller (more on this later) I had a requirement for two analog inputs that would allow connection of external LDRs to enable operation only in low light conditions. Normally you would just use a basic voltage divider with an LDR going to supply voltage and feed the output directly to an ADC. But since this particular LDR was supposed to be connected via long cable I wanted to have a robust analog input that would survive any transients and/or crazy connections that might occur during installation and normal operation.

This is not it. This is the basic circuit that will be used as a starting point: a voltage divider with a non-inverting unity gain amplifier as an input buffer. It works as a universal 0-5V analog input and can be easily expanded to 0-10V using a different value for resistor R2 (see notes below). Another advantage of R2 is that it provides a known reference when nothing is connected to the input so you can also detect broken wire conditions for resistive sensors.
Read the rest of this entry
November 6th, 2010
I was looking for a decent handheld oscilloscope/meter and eventually ended up buying the UT81B from Uni-Trend. There isn’t much information available about this model so I decided to do a small review of it.
Let’s start with some basic specifications from the manufacturer:
- 8MHz bandwidth
- 40MS/s sample rate
- adjustable trigger (level and slope) with single-shot mode
- voltage, current, resistance, capacitance and frequency measurement
- 10 screen memory
- 160×160 monochrome display with backlight
- USB connection
Specs seem quite good for a handheld device and it should accurately display signals up to 4MHz. Time to check it out!
Read the rest of this entry


